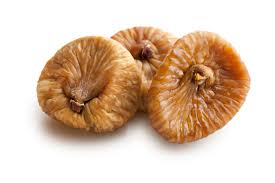
Saturday, December 29, 2012

Baked Sunday Mornings- Classic Shortbread with Fleur de Sel


I enjoy taking a break in the late afternoon - some call it "tea time", some call it a "coffee break". Regardless of what you call it, I think it's essential to have something sweet beside that drink. Something not too heavy that will ruin your appetite for dinner; just a little "something" to get you through the rest of the day. These shortbread cookies are just the answer. I love the touch of fleur de sel sprinkled on top- again, that combination of sweet and salty will get you every time( or at least it gets me!)

I did some playing around with the photos , practicing all kinds of lighting and positions. I know the photo above probably goes against all the rules, with the shadows  etc. but I actually like it so here it is.
I recently bought a large "slice" of an olive tree while we were visiting the Druze village of Ussifiya in the north of Israel ( more on that trip in an upcoming post). The carpenter sanded it and cleaned it up for me, then oiled it to bring out the gorgeous grains.  I used it as my background and I love the effect it gives.


Making these was not difficult , but still a bit tricky. It is important to get the right texture and not overwork the dough. I think I still need to practice it a few times to get the correct feel. It broke apart somewhat during the rolling which probably was a result of the dough being too cold. Below are the first batch results- tried dipping them in chocolate, but wasn't happy with the way it looked or tasted to be honest. Some were rolled too thin, and over-baked.  The final batch came out the best. All the cookies were good, even the well done ones! I like this recipe because it lends itself to playing around with lots of flavors. Next time I'll try some vanilla and add a hint of orange flavor as well. 
You can find the recipe here on Baked Sunday Mornings.

Sunday, December 23, 2012

Baked Sunday Mornings-Holiday Spice Cake with Eggnog Buttercream


Okay, so I've never tasted eggnog before.( Is she serious, you say?!) Yup, it's true! Guilty as charged- no excuses other than I was just never presented with the opportunity. Without having tasted eggnog, I had no idea what the butter cream was supposed to taste like. Let me tell you, it soooooo doesn't matter , because whatever the taste is supposed to be, this frosting is delicious.

Found this serving plate and couldn't resist!
 I knew in advance that I would make cupcakes since I had no use for a whole cake and this way I could freeze them for future use or hand them out to friends and family. I love those warm, winter type spices of cinnamon, nutmeg, allspice, ginger etc. The combination is soothing and comforting, while not being overly sweet.

Then my daughters found these to match and bought me a gift! It's true... cake does complete me!

I must say, I had my doubts about the frosting as I was making it. It didn't seem to come together , but I persisted and eventually it developed in to the creamiest, smoothest butter cream I have ever tasted. This is one recipe I will use again and adapt it to all different flavors. Sweet, but not sickeningly sweet, and since the sugar is cooked, there is no gritty taste.

No question I will use this for a cake at the right opportunity. You can find the recipe here. Enjoy and stay warm!

Sunday, December 16, 2012

Baked Sunday Mornings- Soft Candy Carmels


Candy making is a fascinating process. It's really a lesson in chemistry. Watching what different temperatures do to sugar is something I never learned in chemistry class in high school ( which I barely got through, by the way).
One essential component of candy making is patience- not something I've won prizes for in the past! Having made caramels before ( apple cider caramels by Smitten Kitchen) and Fleur de Sel Spirals ( by Gesine Bullock-Prado), I knew the process and  developed some of that precious "patience" thing. Believe me, it's worth it. Temperature, time and keeping an unflinching eye on everything, make the difference between a success and a hot mess of either undercooked or burned (smelly and smokey) sugar. ( and a nasty clean-up as well)

This recipe from Baked Elements is easy to follow and the results are scrumptious. I had a bit of trouble removing the tin foil from the caramels, even though I sprayed it as directed. To resolve that problem, I stuck them in the freezer for about 20 minutes and other than a few stray pieces, managed to get it all off. Wrapping took a long time but the results are so fun to look at, not to mention the great taste. They're soft, very caramelly(? is that a word?) and just melt in your mouth. I packaged them in pink Chinese food type boxes, ready to give as gifts.

  You can get the recipe here.

Friday, December 14, 2012

Jerusalem Culinary Tour #1

I love to travel. 
I love to eat. 
I love to eat and travel at the same time. 

Before any trip, within the country or abroad, the main focus of my research is always food; foods the country or place is famous for, recommended restaurants, food shops to explore, etc. For me, it's not museums or monuments- it's walking endlessly through the local streets and finding culinary treasures.

I stumbled across an opportunity to sign up for a series of three culinary tours in Jerusalem. How perfect! Of course I immediately sent in my registration and began counting the days until the first tour.
Last Friday Last month was the first tour, scheduled for the Old City. Since the situation here was not ideal for walking through the Old City, they decided to switch the last tour with the first, so we were off to the "shtetel", Yiddish for town, Mea Sha'arim, the ultra-religious section of Jerusalem. Since appropriate dress is the rule for this area, I found myself going through my closet , trying to find something long enough to cover my knees (no pants) and long sleeved shirts. After tearing my entire wardrobe apart and coming across nothing suitable for the occasion, I dragged myself to the mall , going from store to store, trying on dress and skirt, after dress and skirt. Anyone who knows me, knows how much I LOVE trying on clothes..........long story short- found nothing. Came home to reassess the situation and decided on tights, a long tunic, high boots and just for safety sake, took along a very large scarf that I could wrap around me as a skirt if necessary ( which it was!) Too bad I didn't take a picture of myself- quite a sight.

As luck would have it, the day was cold, very rainy and not the best for a walking tour- but those are the kinds of days I love!
The streets were bustling and busy with people buying and preparing for Shabbat.
It's really a different world in Mea Sha'arim and although I don't necessarily agree with the ideology or way of life, I try to respect and appreciate the customs and beliefs of others.
A few of the places we visited.......


Avihail Bakery- making rugelach

a men's hat store- all shapes and sizes for all the different streams of the Haredim(ultra-religious)


porcelain

Brooklyn Bakery- black and white cookies ( or as I call them where I come from- half-moons)

black and white cake- I HAVE to make this one on my own!!
Hadar Geula- buying homemade food for Shabbat


               pasted wall notices- a means of communicating ideas and announcements in Mea Sha'arim-
 this one is urging the ultra-religious to refrain from use of smartphones


This was just a sampling of the stores and food places  on the tour. At times it was raining so hard, I couldn't even take out my camera. I came home with a belly full of traditional Jewish foods, an amazing learning experience and a taste for more. I'll be back here for sure on  my own to spend more time wandering through the streets and shops of this very unique neighborhood in Jerusalem.

Now, I'm looking forward to the next tour at the end of this month. On our way to Shuk Mahane Yehuda
 ( marketplace), what many consider the best shuk in the country. See you there!

Sunday, December 9, 2012

Spicy Brownies


The new ( maybe not so new , but still innovative) rage is sweet and salty-everything from caramels to cookies to cakes- and it's delicious. For some, the thought of combining the two tastes is unthinkable, but if you let your palate experience the flavors, you will understand what I mean. I love the idea of mixing salty pretzels with chocolate, sprinkling fleur de sel on the top of a chocolate frosted cake or, in the other direction, adding chocolate to a sauce for chicken or meat.

This week on Baked Sunday Mornings, the assignment was not actually sweet and salty , but sweet and spicy. I have read a lot about the mixture of peppery spices to sweet dishes, especially chocolate. This was the perfect opportunity to try it for myself. The recipe calls for ancho chile powder, which I cannot find for the life of me ( at least here in Israel) so I did some research on how to substitute. I ground up some sweet chile seeds with a small amount of hot chile pepper seeds and came out with something that tastes great- don't know if it has any resemblance to ancho chile powder but it was worth a try. In any case, ancho chile powder is on my list for my next visit to the States ( adding one more food item to the long list I already have!)

The result is heavenly. The cinnamon flavor comes across quite dominant ( which I love!) mixed with the strong chocolate flavor. That in itself is enough.... but then after chewing and swallowing, you suddenly get that slight burst of spiciness. Not overwhelming, but just enough to let you know it's there, and is it ever out of this world. The texture of the brownies is fudgy and just melts in your mouth. This is a definite keeper!

You have two choices before serving these to people- tell them in advance about the spice or let them find out for themselves. They'll thank you either way!
rich chocolate, ancho chile powder and warm cinnamon

Sunday, December 2, 2012

Baked Sunday Mornings-No Bake Peanut Butter Cookies ( with a twist)


Although I love to bake, the words "no bake" always catch my eye. Can something that is just stirred together without baking actually be tasty? The answer is YES!!!
These no bake peanut butter cookies are from Baked Explorations, the second book from Matt Lewis and Renato Poliafito of the famed Baked in N.Y.  
I'm joining other bakers from "Baked Sunday Mornings" in this weeks assignment. These cookies or candies or whatever you may call them, are easy , fast, somewhat healthy ( well.... they have oats and peanut butter in them- they're healthy aren't they?) and most important of all, delicious. Easy, peasy , as they say , and you can be sure kids and adults alike will gobble them up quickly. 

I followed the recipe exactly (you can find it here) except for one little twist ,which I think , gives the cookies an extra dimension of taste. Instead of 1 cup of peanut butter , I used 1/2 cup of peanut butter and 1/2 cup of speculoos spread.
I am in love with speculoos spread. I use it at every opportunity.  The spread is a paste version of the cookie and is made by a number of companies. Below is the one I found though I have tried others- all good. Actually, "good" is an understatement. The spread is so delicious you I can eat it right from the spoon like a lollipop! It has become the filling for my alfajores instead of dulce de leche. But that's another post altogether.

Anyhoo.... go make these cookies; candies, treats... whatever you want to call them..... right now! Hint: put them in the freezer-they're even better frozen!

Sunday, November 18, 2012

Apples

Growing up in Upstate New York was a treat. I loved the four distinct seasons, which is something I miss very much  living in Israel ( hot pretty much all year round). Each season had its special charm; that something that makes you remember it with a smile. 

Summer was boating time for us and I loved every minute of it.

Winter was snow, snow, snow and with it came skiing on weekends. In those days ( when life was simpler and safer!) my parents used to put us on the bus early Saturday morning for one of the local ski resorts, loaded with our ski equipment and enough money for lunch and a hot chocolate. My brother and I had to be all of maybe 9 or 10 years old.

Spring was , well, springtime.... finally relief from the cold, hard ( but fun) winter .

And then there was fall. I love the autumn with the changing colors of the trees, raking up the falling leaves and that slight chill in the air.
One of my favorite memories is that of going apple-picking; driving out to the countryside to one of the local apple orchards. You paid for what you picked , which wasn't that much for a little kid. The "store" was a roadside stand where they also sold fresh apple cider , pies and other apple products.

With this memory in mind, I decided to choose them as the basis for my "series" photo shoot in the photography course. Here are the results.
apples,
 apples and ......

more apples


apple cider caramels from Smitten Kitchen


crunchy caramel apple pie


Today was the last session of the course and I can say that I enjoyed every minute- even with the frustrating moments I had.
I look forward to continuing to "play" with my camera and improving my skills. I've learned so much yet have so much more to learn. Thanks to Danya and Deanna for the wonderful learning experience, the non-ending support and the chance to get to know such talented and creative women. You're the best!

Monday, November 5, 2012

Food Styling and Photography Course

I am not as consistent with this blog as I would like to be. I'm a professional procrastinator. From time to time I get on a roll and write every few weeks or even once a week, but those instances are few and far between.
One thing that bothers me is the quality of the pictures I take, so I decided to take a photography class. Originally I was looking at general photography classes, but then came across this amazing blog and noticed that the two very talented writers of the blog, Deanna and Danya, were offering a course in food styling and photography. Just what I was looking for!

We are into our  4th session (of 6) now. I have learned so much in such a short time- mainly, how much more I have to learn and practice!  I am amazed at how much time, adjusting and readjusting, it takes to achieve the final shot.

Our first assignment was to copy a photograph of our choice. I knew my first choice would be something from the incredible Tartlette. ( I just ordered her book Plate to Pixel, and am anxiously awaiting its arrival!)
Since cookies are one of the things I make the most, I decided to look for a photo that was do-able for me, both from the standpoint of the cookies themselves and the photo. I wanted to start out with something that ( at least on first glance) seemed like something I could recreate. Below, left, is the photo I chose- the original from Tartlette and on the right, my recreated version. I used a different recipe than the one Tartlette posted and my cookies came out much darker than hers.


my version


Cocoa Nib Chocolate Shortbread Cookies
Original picture by Tartlette


 The second assignment was , believe it or not- cookies! This time I decided to try and photograph some of my decorated cookies, since that is something I do a lot of on the blog. It's quite a different type of medium than what the rest of the girls in the course did, but I went with it anyways. Here is the result. The baby cookies are in honor of the birth of my second grandchild- a boy, who joined us this past week. How exciting!


 Our next assignment is to create a photo of something that reminds us of fall- of course having to do with food. I have a few ideas in mind. We'll see the results next week.

Sunday, November 4, 2012

Homemade Fig Newtons

fresh figs


dried figs


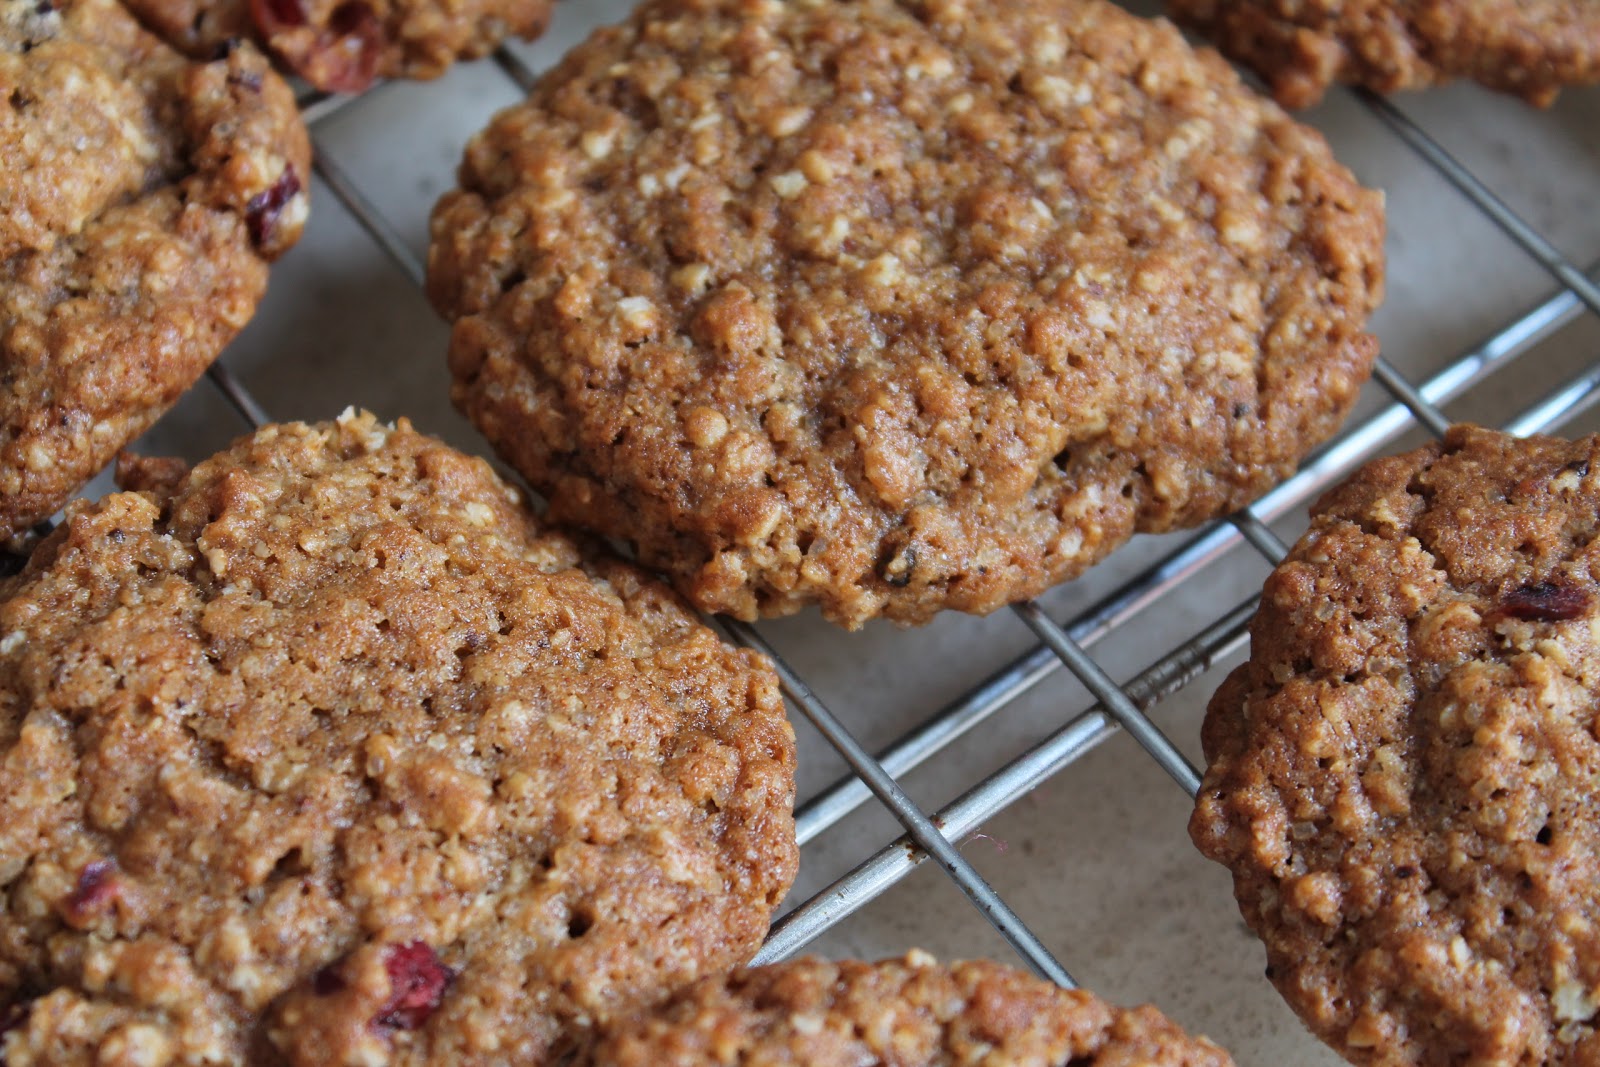
Fig season is here in Israel and I must say that I had never tasted a  fresh fig until recently. They always looked so unappealing to me and though I'm usually open to tasting anything, these just didn't appeal to me.
How wrong I was!!I finally tasted one about two years ago, straight from the tree where they were being picked from. It was like drowning is a sweet, silky bath of deliciousness! How wonderful a taste- now I can't wait for the season to begin each year. I've always liked dried figs, but I must say, there is absolutely no connection ( in my taste buds opinion) between fresh and dried. I like those and I like those. Two different things!
Fig Newtons are one of those childhood memories that one never loses. The texture, the taste, that little crunch of the fig seeds, all melting in your mouth at once. I've always wanted to try a homemade version and finally got around to it yesterday. YUM!! They turned out amazing! Just the taste I remember( and I haven't had a Fig Newton in.... well lots and lots of years).
I actually took two recipes and adapted them to my own. I also did one other thing that was a major accomplishment for me. My daughter does not eat eggs( as of late) and I decided to make the dough using a substitute for eggs.  To my amazement, the dough was easy to work with, rolled out beautifully and baked up just perfect. Certainly can't tell any difference in taste- a success!

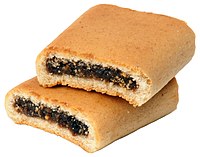
The Original Fig Newton

before baking
before


homemade fig newton


  Homemade Fig Newtons(adapted from various sources)
For the dough:

8 oz.( 280 g.) all purpose flour
4 oz. unsalted butter , room temperature( I used margarine - no dairy!)
1/2 cup sugar
1 oz. honey
1/4 tsp. salt
1/4 tsp. baking soda
2 tsps. vanilla
1/8 tsp. cinnamon
1 tsp. orange zest
1 oz. orange juice
3 egg yolks( for each egg, combine 1 tbsp. apple vinegar and 1 tbsp. baking soda- mix together and add when you would the eggs- I reduced it to just one actually and it came out fine)

For the filling:
1 cup or so of finely chopped dried figs( they say Black Mission is the best- I bought them at an open market so I really don't know what kind they were but the filling was delicious!)
3 tbsp. unsweetened apple sauce
1/2 tsp. orange zest
1 1/2 oz. honey
1/4 tsp. cinnamon
1/2 cup or more of orange juice, as needed


Filling:
Combine the all the ingredients for the filling in a medium saucepan and bring to a boil. Cook on very low heat until soft and jam-like- mine took about 1/2 hour. Set aside.

Dough:
Sift the flour and baking soda together and set aside.

Cream the butter or margarine together with the sugar, honey, vanilla, cinnamon and orange zest until creamy. Scrape the bowl with a spatula and continue mixing. Add egg yolks ( or substitute) one at a time and mix until thoroughly combined.

On low speed, add the sifted flour mix all at once and mix just until incorporated then slowly pour in the orange juice. Continue mixing just until it comes together. The dough will be somewhat wet and soft. Transfer the dough to a large sheet of plastic wrap and flatten into a disc. Wrap tightly and refrigerate for at least 4 hours or overnight.

 Make the cookies:
Even after chilling, the dough will be softer than usual. Dust your rolling surface and the dough, generously with flour and roll out to a rectangle approx. 12x14 and 1/2 in. thickness. Divide into 4 equal strips. Spread the filling along the center of each strip. Fold the dough over and pinch edges. Place seam side down on parchment lined baking sheets  and slice each log on the diagonal into about 10 cookies.

Bake for 12-15 minutes or until golden brown. Cool on a rack.

These cookies get even better over the next day or two. Store in an air-tight container.

Saturday, August 18, 2012

Passion Fruit Sorbet Popsicles


It is so hot here, I feel like I just want to sit in a tub of ice water the whole day. The heat is bad enough, but it's the humidity that really kills. Even in the a/c, the thought of baking is not particularly appealing (though I have made a few things -turned the air down so low, it was freezing in here!).

       
Someone gave me a whole bag of passion fruit from their tree and the first thing I thought of was to make something COLD with them. The Perfect Scoop by David Lebovitz is one of my favorite books and a source of great inspiration. I took his recipe for tropical fruit sorbet as a base and played around with it according to what I had in the house. SO easy, so refreshing and delicious!


 Passion Fruit Sorbet Popsicle (adapted from Tropical Fruit Sorbet- The Perfect Scoop by David Lebovitz)

2 medium-sized very ripe bananas
1/2 pineapple (1 cup canned)
1/4 cup tangerine or orange juice(I didn't have any so I used the juice from the pineapple)
1/4 cup passion fruit juice or pulp(I used whatever I got out of the fruit i had which came to about 3/4 cup)
1 cup sugar (I used  A LOT less, only 1/4 cup or so)
4 tsp. rum( I've made it with and without- good both ways)
1 tsp freshly squeezed lime juice ( used bottle, that's all I had) 

Cut bananas and put in a blender with the rest of the ingredientsPuree until smooth.
The directions say to chill the mix well and freeze in ice cream maker, but I wanted to make popsicles. I just poured the mix  into cute little disposable espresso cups I found and stuck them in the freezer for about 20-30 minutes, then inserted popsicle sticks and finished the freezing. 
Delicious, cool, refreshing !!
 

Tuesday, August 14, 2012

Project Sabbatical

sabbatical- noun

: a break or change from a normal routine (as of employment) 

 This is the dictionary definition I found for sabbatical.  Ah, yes.......... change from a normal routine. Let's see, normal routine: up at 6 a.m., shower, get ready for work ( school), drive the 25 minute ride to work(I'm a very good driver but I hate that daily drive to work!), teach until 3 p.m., drive back home (ugh!), start straightening the house, laundry and getting something prepared for dinner, do some school preparation, eat dinner, clean up, maybe take a walk, then plop down on the couch , only to fall asleep before I can make it through one show... to bed and up again for ANOTHER round of the same. OK, I know, that's life. But sometimes it just needs to change and this is my chance. A whole year of NO routine! 
When I typed in the word sabbatical and clicked on images, it was interesting to see the variety of pictures that came up. Here are a few that I thought were appropriate for me.........
among MANY others!

 Back to reality! So, now I am working out my "sabbatical routine". Until the end of this month, I'm  full-time babysitter for my granddaughter. Nursery school on vacation- parents not.
After that, I think I will make a routine of having no routine! One thing I do want to try and accomplish is to go through my vast collection of cookbooks and actually start  trying some of the recipes. So here is the plan:
each week I will choose one cookbook and make at least one- hopefully 3 or 4- recipe from that particular book, photograph it(them) and post about it. ( The best laid plans of mice and men!) We shall see.
This week I am using  local book in Hebrew called "The Healthy Kitchen". I will be making "Quinoa Burgers" for sure, and whatever else I may find that interests me!
Pictures and recipes hopefully to follow!

Tuesday, July 31, 2012

Oatmeal Cookies

I've had an oatmeal cookies recipe that I've been using for many years. Recently, my daughter made them and said there was a slightly bitter after taste. We went through the recipe together, she showed me all the ingredients she used, but we still couldn't find the source. Maybe the oats themselves were stale although she had just bought them. Who knows how long stuff is on the shelves in grocery stores. In any case, I decided that it was time to find a new recipe for oatmeal cookies. 

After searching the internet and reviewing oodles of recipes I went back to my cookbook shelf and started looking through those. I mean, I could open up my own branch of Barnes & Nobles with all my cookbooks so why not use them?! I find myself looking at recipes online so  often and forget that I have a wealth of recipes just sitting on my kitchen shelf.

One (or two actually) of my favorite books is "Baked , New Frontiers in Baking"  and "Baked Explorations" by Matt Lewis and Renato Poliafito. And YEAH!!!!! they're coming out with their third book "Baked Elements" in the fall.... and we all know I'm pre-ordering it. There are certain things I can resist buying but cookbooks  are not among them! Anyways... they have a recipe for Oatmeal Cherry Nut Cookies, so I knew I had to give it a try. I happened to have some freshly bought dried cranberries in the house, so I substituted them for the cherries. I also did not put any nuts in- I love nuts, but we've got some non-likers (is that a word?) and some allergies in the family so this time I left them out. I'm sure they would be delicious with that extra crunch.


As usual, with  all the recipes I've made from their books, the cookies turned out absolutely amazing. They have a bit of a crunch when you first bite into one, then your mouth hits the chewy center. The tang of the dried cranberries adds just the right flavor and keeps you going back to the cookie tin for more. I froze them so they would last more than one afternoon- but that doesn't stop me (or anyone else in the house for that  matter) from eating them straight out of the freezer!

Oatmeal Cranberry Cookies ( adapted from Oatmeal Cherry Nut Cookies- "Baked , New Frontiers in Baking"by Matt Lewis and Renato Poliafito

210 grams all-purpose flour
1 tsp. baking soda
1 tsp. salt
2 tsp. cinnamon
1 tsp. freshly grated nutmeg
1/4 tsp.cardamon
200 grams unsalted butter
1 1/4 cup firmly packed dark brown sugar
50 grams white sugar
2 large eggs
1 tsp. vanilla
2  3/4 cups rolled oats
1 cup dried cranberries


1. Whisk flour, baking soda, salt, cinnamon, nutmeg, cardamon in a bowl and set aside.
2. In bowl of electric mixer, beat butter and sugars together until creamy.
3. Add eggs, one at a time until each is incorporated. Scrape down sides of bowl. Add vanilla and beat for 5 seconds.
4. Add half of flour mixture and mix for 15 seconds. Add remaining flour mix and beat just until combined. 
5. Fold in cranberries using a spatula.
6. Cover with plastic wrap and  refrigerate at least 6 hours. I left it in overnight and it was fine. Just lets the flavors join together more!
7. Preheat oven to 375 F ( 180C) and line baking sheets with parchment paper.
I used a small cookie scooper to form rounded  balls of dough and place on  cookie sheet. Using the palm of your hand, lightly press down on each mound- just a touch, don't flatten the cookie- leave it fairly thick.
8. Bake 12-14 minutes just until they start to brown. Remove and cool for 5 minutes then transfer the cookies onto cooling racks to cool completely.

Yummy warm, room temperature or even frozen( but that's my quirk!)

Saturday, July 28, 2012

Back Again

 From the wait at the airport.......................


   to the top of the Space Needle in Seattle.........................


to the duck boat ride through the city.........................................


 and on to Pike Place Market , where I could spend the whole day and go back endless times......


setting off on an amazing cruise to Alaska and its breathtaking sights....................


 to riding through the Cascade Mountains in Northern Washington................................


ah...... so much green, so much water......... such cool weather................ then..........


back to our reality of unrelenting heat and humidity...................
 and of course, family................ that's the most important part..................!

 It was the trip of a lifetime. Back home now..... too hot to bake...... lots of things in mind when turning on the oven doesn't seem so ridiculously ridiculous.