Showing posts with label chocolate. Show all posts

Sunday, October 22, 2017

Exceedingly Chocolate Crinkles


The recipe for this week on Baked Sunday Mornings was Apple Pie. I love apple pie, but having just finished the season of the fall Jewish holidays, where EVERYTHING is apples, I decided to go rogue this time. I made cookies from the book we recently finished- Baked Occasions.
There were quite a few "assignments" I missed during the baking of the book, and this was a perfect opportunity to catch up.

These cookies have a million different versions in books and online, but the basic concept is the same for all- that crinkly look. This recipe is easy, straightforward and if directions are followed, should come out, well, crinkley!


Baking is all about chemistry and the interaction between and among various ingredients, how they work together - or against each other- to produce the desired results. I wanted to know what it is that makes these balls rolled in powdered sugar, spread slightly and crinkle during the baking process. I did some simple research and there are a few explanations.n Some recipes say that the combination of baking soda and  baking powder, give the cookie the right amount of lift to spread just enough so that the rolled cookies produces "fissures " or cracks as they bake. All fine, but this recipe has no baking soda in it and they turned out just beautifully "cracked"!
One recipe also says the key is to roll the balls in granulated sugar before rolling them in powdered sugar. Also not required here and the results-again- were perfect.
What is important here is to use quality ingredients(as always), do not over mix the dough, and chill before forming the circles, and rolling them so they are thoroughly coated in powdered sugar.
The result is a soft, cakey center with a slightly crisp edge that just melts in your mouth! Delicious right out of the oven or cooled. ( But who can resist "right out of the oven?!)

You can find the recipe for Exceedingly Chocolate Crinkles here at Baked Sunday Mornings.
Enjoy!

Sunday, September 18, 2016

Mini Chocolate Brownie Cupcakes


Life is so fragile. Every once in a while something comes along to brutally shake us back into reality. Look at things in proportion. All those catch phrases like: "live for today", "cherish the moment", "don't sweat the small stuff" etc. etc. We hear them, nod our heads yes ,yes, and then continue on the rat race of life , forgetting to heed those words. I am one of those people. 


True-much easier said than done. Our lives have become so busy and complicated in these modern times, that sometimes just surviving on a day to day basis, getting things done, making ends meet, can take an incredible amount of energy. In the process we often get lost; lose sight of what matters. then that big "boom" comes along-unexpected, shocking, causing us to STOP! We take a moment or even longer (as in my case) and look at our lives, ourselves and how we really want to live. Sometimes, it is enough to rock our world to make a change. More often we SAY we are going to make a change and then get swept back into the rat race.

My "rock the world" event happened just recently, the other day, in fact. A colleague and friend passed away after a long, painful illness. Just 53 years old, 3 children and a life of beautiful moments clipped short in a most agressive and brutal way. We knew there was no hope, but the reality of the finality is always difficult, regardless. It is then all my questions arise- why? and why in this grueling, painful way? what can I learn from this tragic event? I believe her life and memory can be honored by approaching life as she did. Always positive, helpful, caring of people and animals, I know these are all "words". Putting those words in to practice in our lives is another thing, but at least we can try and make one small change, whatever it may be. 

I have dealt with depression, poor body image and low self-esteem for as long as I can remember. I am aware that much of it is physiological; serotonin, endorphins and all those other big words. But it is also the way I have always looked at life in general. It takes work (at least for me) to overcome or at best, deal with these feelings. Sometimes exhausting, sometimes feeling it is futile, but I keep on working at it.

So today, as I, and our community pay our last respects to this special person, I hope to take away some of her positive outlook, her attitude towards life and her kind, thoughtful being.

As for the recipe for today..... well, chocolate is always chocolate. Probably one of the best bites you can have to make you feel better- even if for that fleeting moment. Recipe can be found here.
So have a bite of chocolate and smile!

Saturday, March 12, 2016

ST. PATRICK’S DRUNK BUNDT CAKE- Chocolate -Stout cake with Whiskey-Bailey's Glaze

That title is quite a mouthful, but so is this cake! If you are looking for something very 
chocolatey with a hint of alchohol, then this is your baby. I don't celebrate St. Patrick's Day , but I certainly don't see that as a prerequisite for enjoying a combination of chocolate, stout, Bailey's Irish Cream and whiskey.
The cake is easy to make- NO MIXER to clean-yay! I acutally didn't have any whiskey on hand so I just upped the amount of Irish Cream. I'm sure that the whiskey would give it a nice,extra kick. (next time, which there definitley will be!)


The whole family willingly indulged at last night's Friday dinner. The youngest participant 
(age 3) enjoyed sitting next to the plate and scooping up the glaze with his finger. He said that was the part he liked the best!!

Give it a try! You can find the recipe at Baked Sunday Mornings, along with the other bakers reactions to this cake.

Enjoy!

Sunday, March 1, 2015

Chocolate Texas Sheet Cake with Peanut Butter Frosting


Not a very appealing looking result, but this Chocolate Texas Sheet Cake really is delicious. Fudgy and chocolatey inside with a sticky, drippy, VERY yummy frosting. You add the frosting while the cake is still hot so it seeps right into the cake. How could that be anything but good?
I was making this cake for my grandson's nursery school " Grandparents Day", and knowing that some kids might not like or even be allergic to peanuts, I changed the flavor of the frosting. 
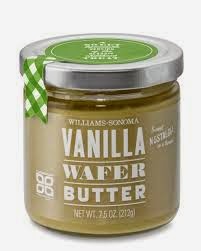
Last visit to the U.S. , I made my rounds to Williams -Sonoma (no way I visit without going there!) 
and came across this.............


.............and this!


Not only did I find them ( they don't always carry them) but they were on sale for really silly prices.
So here I was, worrying about weight restrictions, and carrying back in my suitcase, jars of graham crack and vanilla wafer butter! (among many other things that god only knows how I made the weight limit!)
The graham cracker butter went first, but I had been saving the vanilla wafer butter for the right occasion. This Texas sheet cake was it. The solution to the peanut issue without sacrificing flavor or texture. The taste was great-both kids and grandparents went crazy over it. I threw some sprinkles on top for the kids, but made the mistake of doing it too early and they just sort of sunk into the frosting. Live and learn!

Lately I have been very lazy ( or rather just so busy that I don't have time) to get out my camera and set up the tripod etc. etc. so please excuse the horrible phone photo, but you get the idea!

Not a hard cake to make- give it a try! You can find the recipe here at Baked Sunday Mornings.
Enjoy!


And here is a quick last minute addition for Purim- rainbow hamataschen ( or ozney Haman as they are called in Hebrew.


Sunday, October 26, 2014

S’More-Style Chocolate Whiskey Pudding


Let's start with the end. Above you see the end result of this week's (and last one of the book!) assignment. Some of the comments: "This is a restaurant dessert!" , "so rich",  "sweeet! 
It really was all those things. 

Here's what it looked like before the spoon hit it. The s'mores effect on the marshmallow topping came out sort of funny looking but the idea and taste were certainly on spot. Rich, creamy chocolate pudding with a dash of brandy( no whiskey in the house at the moment). In  the middle a crunchy layer of crushed, baked lotus cookies ( can't get decent tasting graham crackers here, just off-brands and not worth it). The lotus or Biscoff cookies added a wonderful flavor.
 I didn't have any dessert cups ( now on the list of "need to buy") so I used wine glasses. Nice idea- wrong size glass. These were way too big. This dish is so rich and sweet that it really calls for a much smaller portion. OK, at least now I know what to look for when I shop for the dessert cups..
 Halfway through and shared by more than one!

What a sweet way to end the journey through "Baked Elements"! On to "Baked Occasions" ( as soon as it arrives in the mail...ergggg , it takes so long to go over the ocean!)

Get the recipe here at Baked Sunday Mornings.

Saturday, May 24, 2014

Bananas Cake


The name of this cake definitely does not do it justice. It is so much more than a banana cake. A beautiful 3 layer cake that, although it has numerous steps, is well worth the effort. Filled with a creamy peanut butter filling and milk chocolate ganache, then covered with ganache and finally drenched in a chocolate glaze. Who could ask for more?

layer # 1 covered in peanut butter filling


layer # 2 with peanut butter filling and milk chocolate ganache

all three layers with the crumb coat

final frosting
roasted salted peanuts for that little extra crunch

This is a perfect cake for a special occasion and if you're willing to give yourself a little challenge, then go for it! If not- just give me a call- I love a challenge!!!

You can find the recipe at Baked Sunday Mornings.


Sunday, January 19, 2014

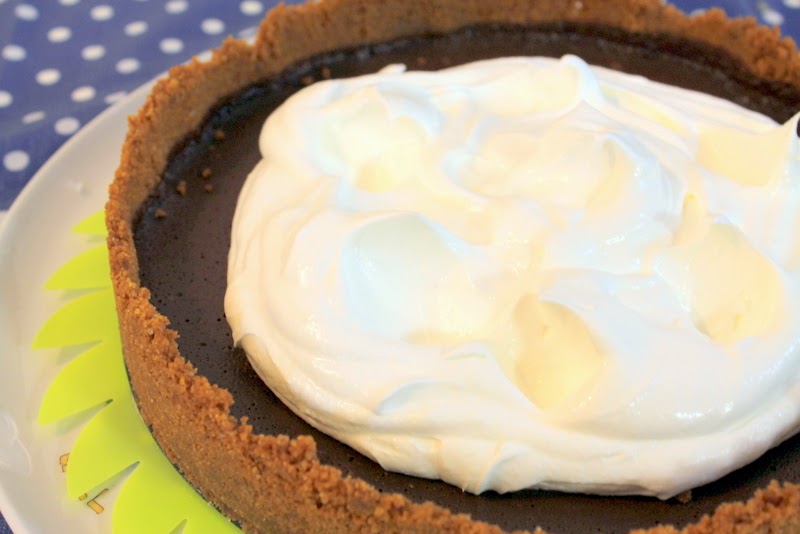
Chocolate Whiskey Tart


Sometimes you come across a recipe that becomes one of your "go to" recipes. One that you know is successful, easy to make in a short period of time and is also adaptable to different flavors. I made this tart the first time a few weeks ago and since then I have come back to it at least 3 times. 
Now, I am not a whiskey lover by any means (more of a white wine person myself) but I always like to make a recipe , at least the first time, according to the original directions and ingredients. I served it at a family Friday night dinner and everyone really went crazy over it. I actually did make one change and used crushed Biscoff cookies for the base. They really deepened the flavor of the whole tart. The whiskey was very evident but in a positive way and gave the tart a wonderful flavor. The options are open as far as different liquor flavors- off the top of my head , I can see trying either Kahlua, Irish Cream or even an orange liqueur. Orange and chocolate go together like peas in a pod (least in my taste opinion!)


Pictures were taken at the very (and I mean very) last minute before the family dove into, and finished off I may add, the tart. I had every intention of sprinkling a pretty design of cocoa powder on top of the whipped cream.....never quite made it that far!Photo quality is not great,(no lighting etc. ,etc.) but you get an idea of what it looked like before barely a crumb was left on the plate (and those were gone in a second after that as well!)

You can find the recipe at Baked Sunday Mornings. Enjoy!


Sunday, January 6, 2013

Baked Sunday Mornings-Malted Milk Chocolate Pots de Crème

This was an "iffy" one for me. I 've made quite a variety of recipes from the "Baked" books and must say, I have loved them all. Not having a lot of experience with puddings or custards, and not being too sure about the malt flavor, I plunged into this recipe, determined to give it the old college try. Since this was a first timer, I decided not to play around with the recipe and do exactly what I was told. (not always an easy thing for me!)
Suffice to say , it worked out just perfectly- they did exactly what they were supposed to do. The real test for me was the tasting. No one in the family has really ever tasted the malt flavor- not even whoppers or malt teasers- they were just never one of our choices in candy. No special reason, just weren't.
I decided not to tell anyone about the malt and do a "wait and see".
I served them for dessert Friday evening to the family. I loved it.The crunch of the crushed Whoppers on top added to the creamy texture of the custard was heavenly. No one "didn't" like it- some felt it was overly sweet for them. I like sweet- even overly sweet. It was smooth, creamy and had a delicate , yet rich flavor. Not too much malt to take over but just that hint that gave the custard that extra zing. 
You can find the recipe here. Not difficult to make and a lovely dessert for guests.

Sunday, December 9, 2012

Spicy Brownies


The new ( maybe not so new , but still innovative) rage is sweet and salty-everything from caramels to cookies to cakes- and it's delicious. For some, the thought of combining the two tastes is unthinkable, but if you let your palate experience the flavors, you will understand what I mean. I love the idea of mixing salty pretzels with chocolate, sprinkling fleur de sel on the top of a chocolate frosted cake or, in the other direction, adding chocolate to a sauce for chicken or meat.

This week on Baked Sunday Mornings, the assignment was not actually sweet and salty , but sweet and spicy. I have read a lot about the mixture of peppery spices to sweet dishes, especially chocolate. This was the perfect opportunity to try it for myself. The recipe calls for ancho chile powder, which I cannot find for the life of me ( at least here in Israel) so I did some research on how to substitute. I ground up some sweet chile seeds with a small amount of hot chile pepper seeds and came out with something that tastes great- don't know if it has any resemblance to ancho chile powder but it was worth a try. In any case, ancho chile powder is on my list for my next visit to the States ( adding one more food item to the long list I already have!)

The result is heavenly. The cinnamon flavor comes across quite dominant ( which I love!) mixed with the strong chocolate flavor. That in itself is enough.... but then after chewing and swallowing, you suddenly get that slight burst of spiciness. Not overwhelming, but just enough to let you know it's there, and is it ever out of this world. The texture of the brownies is fudgy and just melts in your mouth. This is a definite keeper!

You have two choices before serving these to people- tell them in advance about the spice or let them find out for themselves. They'll thank you either way!
rich chocolate, ancho chile powder and warm cinnamon

Wednesday, April 28, 2010

Chocolate Chip Bread Rolls

Chocolate Chip Bread Rolls

I recently received a small  recipe booklet from a local yeast company. I must say, most of the recipes look really good and it was just a matter of which one to start with. Bread is one of my favorite foods and I'm a chocolate freak so the combination of the two of them together sounded like a winner. Hard to decide if they are a roll or a glorified muffin, but whatever, they're darn good!
Easy to make, delicious ( and addicting!) to eat; I highly recommend giving them a try.

Chocolate Chip Bread Rolls
makes 20 rolls
Ingredients:
3 1/2 cups self- raising flour ( 500 g.) ( I didn't have any so I made my own)
8 grams active dry yeast
50 grams butter
1 cup milk ( 250 ml)
1 tsp. salt
1/4 cup brown sugar ( 50 g.)
1/2 package chocolate chips ( 150 g.)
How to:
Place all ingredients except the milk and butter in the bowl of a standing mixer. Mix together thoroughly using the kneading hook, and slowly add in the milk. Add butter and knead for 4 minutes on high speed until the dough is soft and flexible.
On slow speed, add the chocolate chips  until blended in thoroughly. Form a  large ball of dough and place in a bowl. ( I just used the same one.) Sprinkle lightly with flour and cover. Let rest for 30 minutes.
Form small balls of dough ( about 50 g. each). Place on two parchment covered baking sheets. Make two diagonal slices on top of each ball with a sharp knife or blade. Cover and let rise for 40 minutes.
Brush with a beaten egg and bake 15 - 20 minutes in  a 200C ( 190 F) preheated oven.

Saturday, October 31, 2009

Chocolate Hazelnut Sandwich Cookies


I have a "to do" list - meaning things I want to cook or bake- a mile long and in a million different places. I decided it was time to get myself organized and try to tackle the mission. First, I went through all the recipes I 've saved from the web. Deleted what may have looked interesting at the moment but on second thought , didn't really appeal to me. Then I organized what was left, into categories (this organization is too much for me!). Okay, one area taken care of. Next, I went to the notebook I keep with all the printed out recipes I have collected overtime- from friends, magazines, newspapers and the web.Threw out what again, sounded fantastic when I took them, but on reconsideration, realized it was something I either wouldn't probably like, was too complicated or had ingredients I couldn't get here in Israel. That was a nice sized pile in itself. I get carried away sometimes!

So now, I have a still long "to do" list, but it seems a bit more approachable. Now comes the committment part. I am making a pact with myself ( can you do that?) that I will tackle at least one recipe a week from the "to do" list. Hopefully post about it too- now that's another story alltogether.

This recipe has been on my "to do" list for ages. No particular reason I'm starting my quest to go through the list with this one, just had a chocolate thing at the moment and these looked irresistable.
I found it in Hebrew on a local food site. The picture of the cookies was so enticing, not to mention the sound of the ingredients. What could be bad about chocolate and hazelnut?
I made the cookies as per the recipe but I think next time I would make some changes, even though the end result was absolutely amazing. All who tasted said they were heavenly.
My main problem was that the dough was very soft to work with, even after being in the refrigerator all night long. I found I had to re-refrigerate it afer each rolling because it just got too soft to work with. I definitely suggest trying these cookies - I will write my suggestions for changes in parentheses. If anyone out there comes up with other alterations, feel free to comment.

Chocolate Hazelnut Sandwich Cookies (original recipe said it makes 30 cookies- I got about half that !)

80 grams butter, cut into small cubes , slightly softened
1 teaspoon vanilla extract
1/4 cup  (55 grams) sugar ( it called for fine sugar- I used regular cause that's all I had- might try powdered sugar next time)
1 egg
1/2 cup (50 grams) hazelnuts, ground fine ( I grind them in a small coffee/spice grinder and add a small amount of flour to prevent it from turning into a paste)
3/4 cup (110 grams) flour (I think I would add a bit more next time,maybe it will make the dough a little less soft)
1/4cup (25 grams) cocoa powder

Filling:
100 grams bittersweet chocolate,melted
50 grams butter
1/2 cup (110 grams) Nutella

1. Cream butter and sugar in a mixer with paddle attachment until creamy.
2. Add egg and vanilla and mix until uniform.
3. Add the ground hazelnuts and mix.
4. Sift flour and cocoa powder together.
5.Mix into the wet mixture slowly until combined.
6.Wrap in plastic wrap  or baggie and refrigerate at least 1-2 hours ( maybe even in the freezer to harden it more- will also try that next time)
7. Preheat oven to 180 C ( 350 F). Roll out dough between two sheets of parchment paper (not too thin) and cut into circles using a round, fluted cookie cutter(doesn't have to be fluted, just plain round is fine- looks pretty though!) ( I happened to have a set with one solid and a matching one with a center hole)
8. Bake on cookie sheets lined with parchment paper or silicone mats for 8-10 minutes. Remove from oven, cool on baking sheet for five minutes then remove to further cool on a cooling rack.
9. For the filling: Melt chocolate over a bain marie.Turn off heat and add the butter and nutella. Stir to form a thick, shiny cream.
10. Spread a generous amount of cream on the flat side of one cookie with an offset spatula and top with another. (The original recipe says to put the cream in a pastry bag and pipe it on with a star tip. I didn't bother since there weren't enough cookies in my opinion to take the time to do that.) Press slightly to adhere . You can sift a small amount of cocoa powder on top if you like. I didn't.
Can be stored in a tightly closed box up to three days.The cookies can also be frozen without the cream for 2-3 months.

Saturday, October 17, 2009

Just playing around

I hate to waste. When I bake, I scrape the bowl clean of any dough or batter so well it hardly needs cleaning!(Don't worry, I really do wash them!) The waste thing also goes for leftover components of a recipe. When I made that coconut cake last week , there was a lot of leftover filling and frosting. I knew that if I just refrigerated them , waiting for an opportunity to use the stuff, it would spoil. So I had to come up with something to make good use of both things. I love anything with a chocolate-coconut combination ( Bounty Bars!!) so I whipped up a batch of simple chocolate cupcakes. I put a spoonful of the batter in the muffin cup, then a scant teaspoon of the coconut filling , finally covering it with another large spoonful of batter. They baked up so beautifully! Frosted with the leftover frosting, they were a big hit with the lucky third grade class I taught the next day!!


Now, after all that, I STILL had filling leftover. Among my endless pile of recipes "to make", I found one for homemade peanut butter cups. OK- so why not just make them with coconut instead? Like a homemade Bounty bar! They are fast, easy ( no tempering) and didn't last two minutes on the table in
the teacher's room. Now the coconut filling is finally gone! Here's the  how to:

Chocolate-Coconut Cups
(adapted from Joyofbaking.com)

Line 36 mini muffins tins with paper liners (it may yield even more than that)

Chocolate part:
9 oz. (225 grams) semi sweet chcolate, coarsely chopped ( I used bitter chocolate)
9 oz.( 225 grams) milk chocolate, coarsely chopped
1 tablespoon ( 10 grams) butter ( the original recipe calls for shortening, but I can't get it here so I used butter and it worked just fine)


Melt the chcocolates and butter in a bowl over a pot of simmering water.
Drop a teaspoonful of chocolate into the muffin cups. Place a scant teaspoon of the coconut filling over it then top with another teaspoon of chocolate. Refrigerate until set. Store in a closed container in the fridge- if they last that long! Enjoy!

Thursday, July 2, 2009

Chocolate Week

Had some trouble posting this but I think it's all straightened out now. Anyways, as I was trying to say before, the pastry chef course I have been taking is coming down to the finish line. Next Monday we have our final test( gulp!). This past week was the first of two lesson about chocolate. We learned about the origins of chocolate, how it is made, what makes a fine chocolate and how to work with it in baking. Next week comes the candy part. The 4 recipes we made were all quite simple, but very rich and delicious, as well as impressive on the plate. (Not to mention impressive on the waistline!)


Coconut Chocolate-Orange Treat
three layers of a coconut macaroon type with chocolate-orange ganache in between-
total decadence!


Three Chocolate Cookies-
a chocolate cookie with bitter, milk and white chocolate chip pieces
(at home I exchanged the white chocolate chips for peanut butter chips- both were amazing!)


Cremeux chocolate tart-
a delicious base with chocolate, carmelized nuts, butter and a bit of flour (wow!),
a crispy middle and cremeux in between! Hard to describe the incredible flavor.


Coffee-Chocolate Brownies with a cheese and white chocolate topping- just the best!

Recipe for these brownies ( which can also be marbelized instead of having the cheese on top)
For a small square pan( I used an aluminum 25cm x 18 cm)

Brownie mix:

80 g. dark chocolate
80 g. butter
1 tsp. instant coffee diluted in 1 Tblsp. hot water
100 g. brown sugar
60 g. white sugar
2 eggs
60 g. white flour
pinch of salt
20 g. chopped walnuts

Heat oven to 170 C (325 F)
Butter the pan well.
Melt the chocolate, butter and coffee in a double boiler ( bain marie) . Mix until smooth. In a separate bowl, mix eggs and sugar well and then add to the chocolate mix which has been removed from the heat source. Continue to mix until smooth. Add the flour, walnuts and salt and lightly mix.
Pour into pan and bake 17 minutes.

In the meantime prepare the cheese topping:
30 ml. heavy cream
75 g. white chocolate
100 grams cream cheese (here in Israel I use a soft white cheese that is 9% fat) If you use Philadelphia, be sure it is softened to room temperature.
25 g/ sugar
1 egg
20 g. flour
1/2 tsp. vanilla extract

Melt the heavy cream and white chocolate in a double boiler. In a separate bowl mix the cheese, sugar , egg and vanilla. Mix in the chocolate mix. Add the flour and mix well until smooth with no lumps.
As soon as the brownies are finished baking for 17 minutes, take them out and carefully pour the cheese mix on top ( start from the sides and let in fill in towards the middle) and return to the oven for another 15 minutes to set. The top should not brown. Cool completely and cut in to small squares (they are very rich!) I dusted some with cocoa and some with confectioner's sugar and set them on a plate in a checkerboard fashion. Use your imagination!

Sunday, May 10, 2009

Mozart Cake


This is the cake I made for my friend's birthday. For this one you've got to take a momentary break from any diet you may be on. It is so rich, that a small piece will do the trick, but even if I say so myself, it is amazingly delicious. The combination of the meringue base and layer, with chocolate creme and then layered with a white chocolate and dark chocolate mousse in between- well what can I say.......


The cake is not hard to make, but does take a long preparation time. Baking the meringue bases, making the mousse , chilling, putting together all the pieces and freezing, but boy is it worth the effort. Recipe follows- it's from a collection of best recipes from a popular Israeli food magazine called "Al HaShulchan" ( On the Table). They call it "Mozart Cake"
Mozart Cake
Ingredients for a 26cm. springform pan

Meringue
4 egg whites
1/2 cup sugar ( 100 gr.)
3/4 +1 tablespoon ( 100 gr.) powdered sugar
3/4 cup ( 70 gr.) ground hazelnuts
3/4 cup ( 70 gr.) ground almonds

Mousses
750 ml. sweet whipping cream
225 grams bitter chocolate, chopped
225 grams white chocolate, chopped

Chocolate Creme
100 grams bitter chocolate, chopped
1/3 cup + 1 tablespoon whipping cream
50 grams butter

Topping

1/2 (120 ml.) whipping cream
150 grams bitter chocolate, chopped
1 1/3 cups (150 grams) hazelnuts or walnuts chopped or sugared hazelnuts, broken into small pieces

Prepare the meringue:
1. Whip egg whites in mixer until just foamy. Slowly add sugar and continue whipping until soft, stable peaks are reached.
2. Fold in the powdered sugar, hazelnuts and almonds.
3. Using the base of a 25 cm. pan, outline the circle of the pan on two separate pieces of parchment paper. Turn the papers over ( so the pencil side is down) and place on a baking sheet.
4. Using a spatula or piping bag, fill in circles of the meringue using the pencils marks as the outer border.
Bake at 110 C. (225F) for 2 hours until the meringue hardens.

Prepare the mousses
1. Heat the whipping cream until just before boiling.
2. Prepare one bowl with the dark chocolate and one bowl with the white chocolate. Pour half of the hot cream over the dark chocolate and the other half over the white chocolate. Mix until smooth cream is formed for each and chill inthe refrigerator at least 4 hours.

Prepare the chocolate cream
1. In a pan, melt all the ingredients for the chocolate cream, mix and cool.
Putting it all together:
1. Place one meringue base in the springform pan and spread the chocolate cream over the top.
2. In a stand mixer, whip the chilled white chocolate mousse. If it hardened too much in the fridge, let it soften for a few minutes at room temperature before whipping.
Spread the white mousses over the cream. Place the second meringue base on top of the white mousse. and press firmly down.
3. Whip the dark chocolate mousse and spread evenly over the top meringue layer.Freeze for ay least 24 hours.
After the freeze:
1. Heat the last bit of whipping cream to almost boiling.
2. Pour the cream over the dark chocolate and stir untilthe chocolate melts.
3. Pour the topping over the frozen cake evenly. Return to the freezer for about 10 minutes, until the topping hardens. At this point you can cover the cake with plastic wrap and leave in the freezer for a few days.
4. To serve, remove from freezer and deforst for 3-4 hours in the fridge. Release the cake from the pan using a hot, wet kitchen towel wrapped around the pan to help it slip out easily.
5. Press the chopped nuts onto the sides of the cake.
6. Cut the cake with a smooth edged knife dipped in boiling water to help cut it smoothly.
After all that work, you want the slice to look great on the plate, not a messy bunch of goop!


Enjoy!